Despite being a relatively recent addition to the domain of home improvement, laminate flooring is quite popular in modern-day interior decoration. It fulfills the demands of many homes because it is inexpensive, adaptable, and simple to maintain.
It’s also easy to install, but that doesn’t mean you should rush into it without planning ahead of time. If you do it wrong, you’ll either waste supplies or be compelled to endure an unsatisfactory flooring project. For the best result, ensure your laminates are of super-high quality and are coming from a trusted supplier.
To help you prevent such scenarios as a waste of time, money, and material, we’ve put up the following essential steps to install laminate flooring. So keep this guide handy always and go over it before you begin your first home renovation project!
How to Lay Laminate Flooring
Laying laminate flooring on concrete is a do-it-yourself task that is practical and achievable. You can install laminate flooring on a concrete basement, concrete floor, concrete stairs, or concrete slab, among other floors. However, to save you the stress, time, and possible damage and waste, feel free to seek the services of a home remodeling expert.
So, the procedures outlined below will show you how to install laminate flooring over concrete floors properly:
1. Prepare your floor
Before you lay laminate flooring, you need to ensure your concrete surface is neat and smooth. It is critical to examine your entire floor and fix any damage before installing. This step is essential since your floor is the basis for a durable, damage-free floating laminate floor. Thus, we will not advise installing laminate flooring over a new concrete floor that’s not up to a month old since that’s how long it takes for concrete to dry correctly.
A dry concrete structure also prevents laminate planks from warping and cracking. You can determine how wet or dry your floor is. To do this, use a moisture meter or concrete moisture test kit before installing laminate flooring. Likewise, brushing or scrubbing the surfaces will remove dirt and debris. Finally, use a long level to examine the levelness of the concrete surface.
Any variations over 3/16th of an inch per 10-foot are unsuitable for laminate flooring, and you must correct them with a concrete grinder. Because laminate boards do not adhere well to uneven surfaces, the grinder also helps to polish the concrete surface. Meanwhile, a leveling solution can fill in the gaps.
You will also love: Facts About Bathroom Remodeling
2. Gather the Tools You’ll Need
:max_bytes(150000):strip_icc():format(webp)/how-to-lay-laminate-flooring-1822250-10-8e53f27b61734e0fa8617209d98b598d.jpg)
Once you’re done cleaning your floor, the next thing to do is to gather the tools and materials needed. You must follow the guidelines to make sure that your laminate floors are solid and long-lasting, and this begins with getting the proper tools and some flooring products. You can find these materials and tools at the hardware shop near you. Below are the right tools you’ll need for a brand new floor;
- Pencil
- Safety glasses
- Pull bar
- Tapping block
- Gloves
- Rubber mallet
- Dividers
- Saws: table, circular saw or table saw, jigsaw, hand, and miter
- Drill
- Spacers
- Carpenter’s square
- Utility knife
- Tape measure
- Pocket plane
- Chalk line
- Router
- Hammer
- Laminate glue
- Duct tape
- Chisel
- Foam underlayment
- White vinegar
- Laminate flooring cutter
- Laminate flooring planks
3. Take Measurements
You must correctly measure the surface you’re dealing with to get the most satisfactory outcomes with your laminate flooring installation. Begin by measuring the room’s square footage or the wall perpendicular to the way you want your planks to be aligned.
Leave some space for expansion of the flooring—about ¾ inches is ok. Then divide the width of the room by the width of a single board to calculate how many rows of planks you’ll need. Since this number may not be accurate, you’ll probably have to trim the planks to align with the last row, leaving an expansion gap at that angle.
Now, you can start cutting the laminate planks. It’s not a challenging task since it is made of a thin fiberboard core. Your flooring equipment may give detailed information on how to cut your materials. If not available, you can use any of the saws (handsaw, circular saw, or table saw). However, a fine-tooth blade is better because it reduces cracking.
Duct tape may also keep the planks from shattering by placing them on the cutting surface. Cut with the finished side facing up.
4. Install the Underlayment
/how-to-lay-laminate-flooring-1822250-04-e2971fa6cba84aaabb1bd9d571fbd745.jpg)
The fourth step in our laminate flooring installation guide is to install underlayment. This is essential, especially if your flooring does not have affixed padding. Underlayment is a necessary component of a laminate setup because it acts as a padding and potential vapor barrier between the subfloor and the laminate.
This light, scratch-resistant, solid foam layer absorbs sound, acts as a moisture barrier, and makes walking on the laminate floors smoother. In addition, it helps the laminate floors in bridging tiny gaps and bumps in the underlying floor.
Bring out the underlayment sheets and buffet the edges together so they won’t overlap each other. Next, seal the seams with the tape, just as the manufacturer stated. Some underlayment have trim adhesive corners for joining the layers. Use a sharp utility knife to cut the underlay to fit against the wall and barriers.
Installing your underlayment correctly helps ensure the success of your floating floor.
See also: How To Prepare For A Home Remodel – Renovation
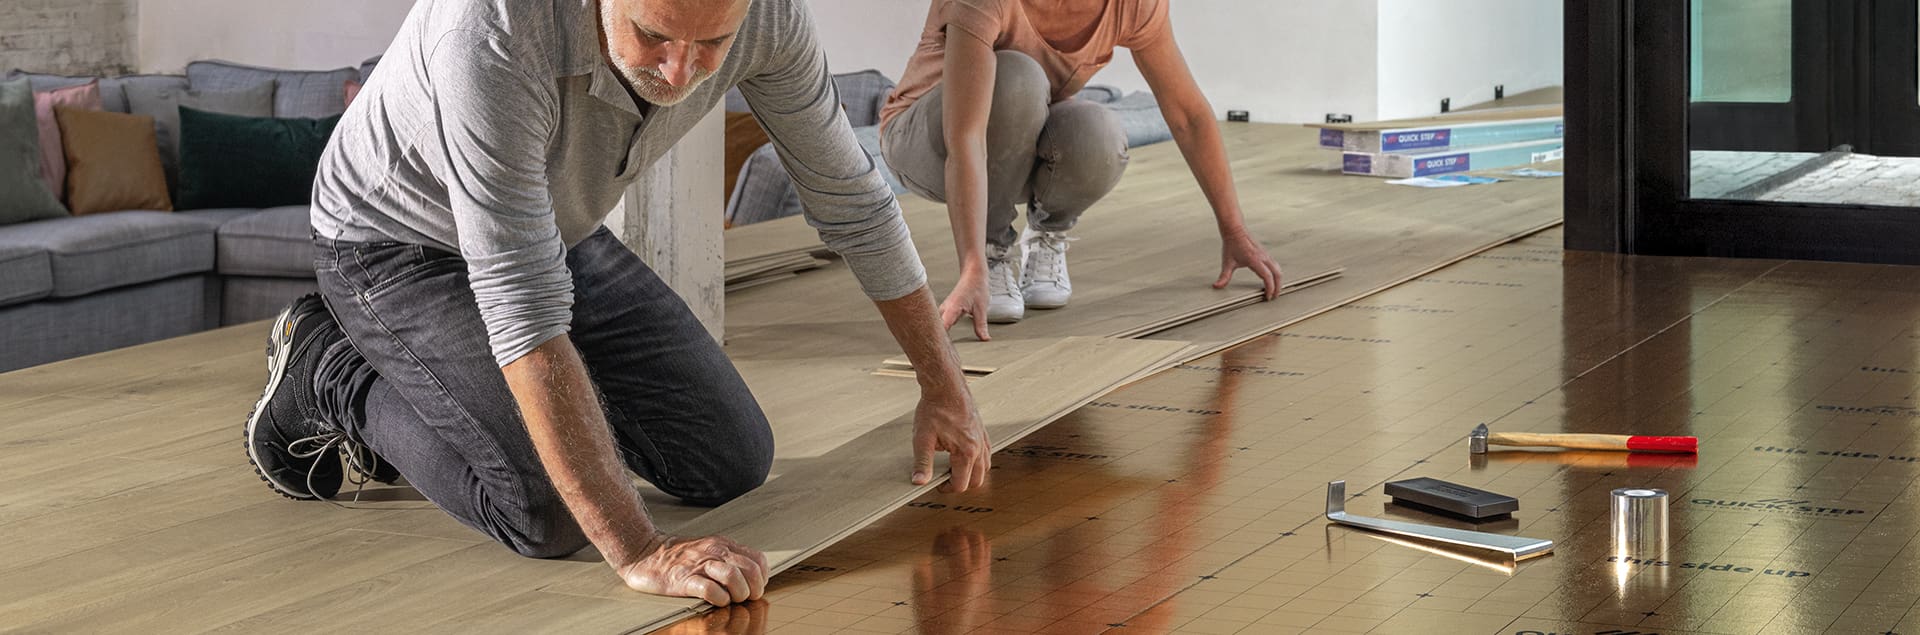
5. Lay in the First Row
Here, choose the wall you will begin the setup on. It’s a good idea to install flooring against the longest wall. If the room has a significant viewpoint, such as a fireplace or enormous windows, you may choose to place your flooring perpendicular to that wall. Begin laying flooring with the first plank on the first row by allowing the tongue side of the boards faces up against the wall.
You may also use a tool knife to remove the tongues from the first row of boards. Trimming off the tongue is not essential, though, because the baseboard will cover a portion of your first and last rows. Position the groove of the next piece into place, then push down to clamp it into place. Use 38-inch spacers around the wall to allow for expansion and contraction of the flooring.
Then, continue to place planks until you reach the end of the row. You may need to trim the last piece to fit the area thoroughly, leaving an expansion gap. Remember, you can install laminate planks as long as your old floor coverings, such as sheet vinyl, are level, smooth, and not too soft.
6. Install the Second and Subsequent Rows
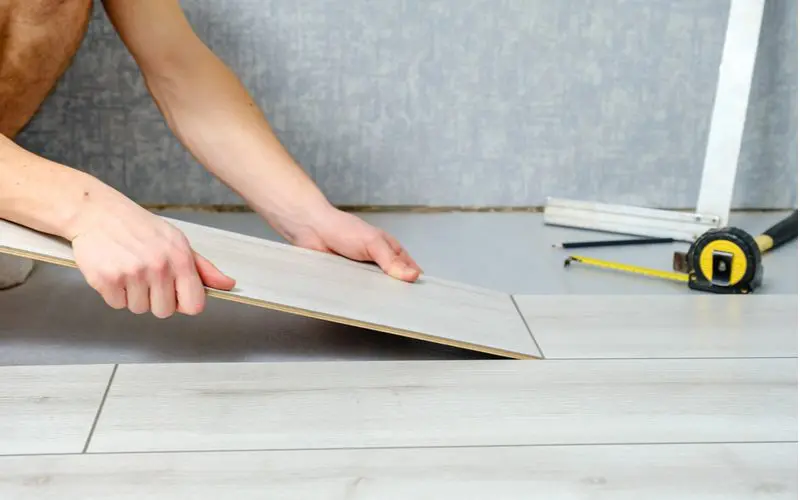
After you’ve finished the first row, take it one plank at a time, aligning tongues to grooves. Begin the second row with the remaining cutoff piece from the first row, ensuring the end joints are at least 12 inches apart. As needed, use the flooring cutter to cut the first and final piece of each row. Gently tap each plank into position with your hammer and tapping block. It can harm the laminate surface or tongue if you hammer too hard.
Ensure you stagger the end joints of adjacent planks by at least 6 inches for a long-lasting, appealing installation. This also helps to protect the floors from splitting and tight joints from collapsing. When installing the last row, you may need to cut little width out of your boards.
7. Add Finishing Touches
/laminatefloor-wwarby-56a1bb795f9b58b7d0c2188a-5a415aeceb4d5200373740c1.jpg)
Unless you’re fortunate, you’ll have to cut your last plank to complete the laminate floor installation. Label boards for tearing in the last row, keeping in mind the 1/4-inch expansion space between the flooring and the wall. Using a circular saw, table saw, or jigsaw, rip the final row of planks.
Using the same tongue-and-groove matching method, attach the final row of ripped boards. Because you’re working against the wall, the last row of boards might be tricky. Even in tight spots, such as under a cabinet overhang, you should be able to tilt the board up to secure it into place.
To finish the project, install thresholds anywhere there is a door or where the laminate meets any flooring material. Also, remove any spacers and add baseboard molding around the walls. The molding should completely conceal the spaces around the walls.
Frequently Asked Questions
Below are a few related questions you might need answers to when planning a laminate floor installation.
Is it Challenging to Install Laminate Flooring?
It’s easy to learn how to install laminate flooring, and this popular do-it-yourself renovation significantly influences the appearance of a home. Laying a laminate floor requires no nails or glue, and the planks are simple to install and alter as needed. Tap the edges snugly and leave a space around the floor’s perimeter.
Is it compulsory to underlay before Installing Laminate Flooring?
Every floor needs an underlayment before attaching laminate flooring. The underlayment acts as a vapor barrier between the concrete and the laminate planks. Without it, your laminate installation may get damaged, deformed, or cause structural issues.
Can I use Glue or Nails to Install Laminate Flooring?
Even though certain materials can be glued down, it is preferable to let laminate flooring hover on top of the subfloor or existing floor. This is because the glue would harm the existing concrete floor. Avoid this procedure when installing laminate plank flooring in flats or other areas where a temporary surface is required.
What is the Best Tool for Cutting Laminate Flooring?
The best tool for cutting laminate flooring is a laminate flooring cutter. Machines like this cut smooth, accurate slices through the flooring with ease. In other cases, though, you can use a handsaw, a miter saw, or even a utility knife.
Conclusion
Laminate flooring is a trendy choice for homeowners who want the aesthetics of ceramics or real wood flooring at an affordable price with easy installation. If you abide by the steps above, you’ll have a beautiful floor in no time.
Do you want to revamp your living area without having to break the bank or spend too much time on installation? Send Firenza Stone a message today and we will deliver some of the highest quality laminate floors you can find in the market.